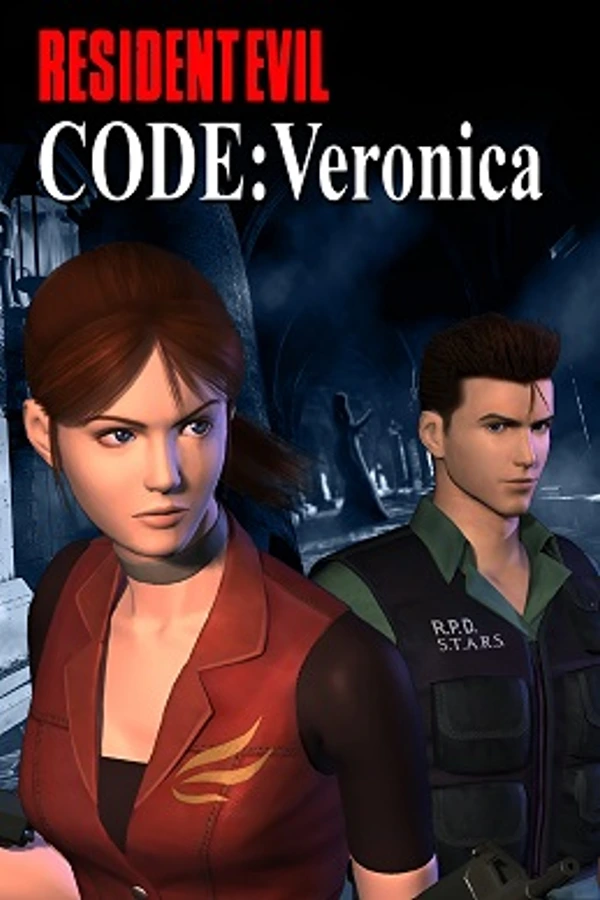
Resident Evil Code: Veronica X HD (PC recomp)
OrigenPlayStation 3
TecnologíaRecompilación Estática (C/C++ nativo)
Disponible paraWindows
Ver proyecto oficialInformación oficial del proyecto
Resident Evil Code: Veronica X — PC Port
An unofficial native Windows port of the PlayStation 3 version, made by static recompilation.
English | Português (Brasil) | Español
Replay the PS3 version on PC. Practice routes with a native SRT, room selection and saves anywhere.
Game setup · Speedrun practice · Features · Gallery
</div>[!IMPORTANT] No game files are included. This repository and its releases contain only the port: no game data, no game executable and no code generated from it. You need your own original copy of the PS3 game (PSN release). Resident Evil, Code: Veronica and all related names, characters and images are trademarks and copyrights of Capcom. This is a fan project. It is not affiliated with, authorized or endorsed by Capcom or Sony Interactive Entertainment.
Downloads — v1.5.0
v1.5.0: native 60 FPS smoothing for EU/US/JP, smoother inventory transitions with equip/unequip fixes, FSR 3.1 Frame Generation alongside smoothing, fixed European door skipping, a lighter appearance preview and reorganized Recomp Settings. 30 FPS and Classic movement remain the initial defaults. Game-text selection supports EU/US; the additional US languages use your registered EU installation, while JP remains Japanese only. AVX2 and automatic SSE4.1 compatibility builds are included.
Special thanks to Lyxodius for PR #36, reviewed and extended by Kastiel for this release. Read the complete English/Portuguese changelog.
RE Code Veronica Recomp Release v1.5.0
| Download | Contents |
|---|---|
| CodeVeronica-PC-v1.5.0.zip | Windows port with launcher and EU/JP/US support. Extract everything and open Code Veronica.exe. |
| Veronica-PKG-Extractor-v1.0.1.zip | Separate, unchanged PKG preparation tool for your own game; RPCS3 extraction is also supported. |
| HD texture pack (Google Drive) | Optional community HD textures for the US, EU and JP versions, adapted to this project. Credits, channels and install steps: TEXTURAS-HD-COMUNIDADE.md. |
| CodeVeronica-LiveSplit-Speedrun-v1.0.zip | Previous LiveSplit Any%/S-Rank split lists and setup instructions. |
English and Portuguese instructions are included. Original game files and licenses are not included. Releases.
<p align="center"> <img src="docs/images/gameplay-claire-red-room.jpg" alt="Resident Evil Code: Veronica X" width="880"> </p> <details> <summary><strong>Contents</strong></summary>- Speedrun practice
- What is this?
- Why the PS3 version
- Supported versions
- Requirements
- Preparing your game
- Installing and playing
- Features
- Shortcuts
- Screenshots
- Known issues
- Building from source
- Running the tests
- Repository layout
- Credits
- License
What is this?
This is a native Windows x64 port of Resident Evil Code: Veronica X for PlayStation 3. It is not an emulator. The game's PowerPC (PPU) and SPU code is translated ahead of time into C/C++ with ps3recomp, then compiled into a normal Windows executable. The PS3 system libraries are reimplemented, and the RSX graphics run on Direct3D 12.
On top of that, the port adds its own launcher, modern graphics options, 60 FPS, frame generation, a speedrun-ready SRT overlay, practice tools and more. Everything is described below.
Why the PS3 version
I am a big fan of Resident Evil and of Capcom, and Code: Veronica is one of my favourite games in the series. I chose the PS3 version because it is the one many speedrunners use, and I wanted them to have a fast, stable PC version with tools made for practice: health, inventory, enemies and time on screen, plus the ability to jump to any room.
The port is for every player: people who want to replay the game with higher resolution, 60 FPS and modern controllers, and also people who run it competitively.
Built for speedrun practice
Alongside a modern PC presentation, Veronica Port is built for speedrun practice. Repeat a difficult room, prepare a boss fight or work on an inventory route using tools available directly in the port.
| Practice tool | What it helps you do |
|---|---|
| Native SRT · F8 | Monitor player and enemy health, inventory, ammo and in-game time. |
| Room selection · F7 | Load a room and choose its entry point to repeat a section. |
| Save and load anywhere · F7 | Keep separate practice saves and return to a setup quickly. |
| Item menu · F6 | Prepare weapons and supplies for a specific test. |
| LiveSplit integration | Use the included autosplitter that also attaches to the port. |
Enable the optional practice tools in Cheats. They are tools for training; whether a run is eligible depends on its category and community rules.
Supported versions
Only the PSN releases, version 01.00, are supported. Each region has its own executable; they all share the same launcher, settings, saves and caches, and each launcher starts the right executable for the chosen game folder.
| Region | Title ID | Executable | License file (.rap) |
|---|---|---|---|
| Europe | NPEB00553 | CodeVeronicaPort.exe | Required |
| United States | NPUB30467 | CodeVeronicaPort_US.exe | Required |
| Japan (BIOHAZARD CODE: Veronica Kanzenban) | NPJB00135 | CodeVeronicaPort_JP.exe | Not needed |
Game updates, disc releases and other versions are not supported. The launcher checks the version and tells you if a folder is not compatible.
Requirements
- Windows 10 or 11, 64-bit.
- A graphics card with Direct3D 12 support.
- The Microsoft Visual C++ Redistributable (x64). Without it, Windows reports a missing
MSVCP140.dllorVCRUNTIME140.dll. - Your own copy of the game, as a folder (see below).
No PS3 firmware and no RPCS3 are needed to play.
Test PC
The port was developed and tested on this PC, where the game was completed from start to finish:
| Part | Model |
|---|---|
| CPU | AMD Ryzen 5 5600X |
| GPU | AMD Radeon RX 6700 XT 12 GB |
| RAM | 32 GB DDR4 |
Other PCs should work, but this is the configuration that was actually tested.
Preparing your game
The port reads the game from a folder, not from a .pkg file. It works like the PS4 ports that use shadPS4-style game folders: the PKG must be installed or extracted first. A .pkg file cannot be opened directly.
The folder you choose must contain PARAM.SFO and USRDIR\EBOOT.BIN:
NPEB00553\            (or NPUB30467 / NPJB00135)
├── PARAM.SFO
├── ICON0.PNG
└── USRDIR\
    ├── EBOOT.BIN
    └── BHCV\ ...
Step by step
- Get the game folder from your PKG. Choose either method:
- Veronica PKG Extractor (optional, separate download): when available, download
Veronica-PKG-Extractor-v1.0.zipfrom the project's Releases, alongside the latest port ZIP. Unzip the tool, openVeronicaPKGExtractor.exe, drop or select your PKG, choose a destination and click Extract PKG. It creates theNPEB00553,NPUB30467orNPJB00135folder with the original package files. Add that folder to the launcher. This tool is only for the three supported Code Veronica PSN base releases, version 01.00. - RPCS3: install your PKG using File → Install Packages/Raps/Edats. The game folder is at
RPCS3\dev_hdd0\game\NPEB00553(orNPUB30467/NPJB00135). Add that folder to the launcher. RPCS3 is only needed for this preparation step. Both methods produce the game folder the port needs. You only need one method. If your game is already extracted, the extractor download is unnecessary. The launcher does not open PKGs directly, and the extractor does not create RAP licenses.
- Veronica PKG Extractor (optional, separate download): when available, download
- Find your license (
.rap) for the European and American versions. It is the.rapfile of the account that bought the game. In RPCS3 it is indev_hdd0\home\00000001\exdata, with the title ID in its name (for exampleEP0102-NPEB00553_00-….rap). If the.rapfile is inside the game folder, the launcher finds it on its own. The Japanese version does not need a.rap. - Keep the original files as they are. You do not need to decrypt anything: on the first start, the port decrypts
EBOOT.BINwith your license into its owneboot_cachefolder (it takes less than a second). Your game files are never modified.
Installing and playing
- Install the Visual C++ Redistributable (x64) if you do not have it yet.
- Extract the whole ZIP to a folder where you can write, for example
C:\Games\CodeVeronica. Do not run it from inside the ZIP or fromProgram Files, and keep all files together. - Open
CodeVeronicaPort.exe(any of the three executables opens the same launcher). - On the Games page, add your game folder for each version you own, and the
.rapfor EU/US if it was not found automatically. - Select a version, adjust the graphics and controls, and press PLAY.
The first sessions may stutter a little while shaders are compiled. They are saved in shader_cache and are not compiled again.
Where things are (all inside the port folder): settings in cv_launcher.ini; saves in gamedata\dev_hdd0\ (a different folder can be chosen in the launcher); caches in shader_cache\ and eboot_cache\ (safe to delete, they are rebuilt); screenshots in screenshots\; the last session's log in run-log.txt, useful when reporting a problem.
The launcher can also check the GitHub releases and update itself (it can be turned off in the launcher).
Features
Launcher
- Its own launcher, available in 13 languages: Português (Brasil), English, Español, 日本語, Français, Deutsch, Italiano, Polski, Türkçe, العربية, 简体中文, 한국어 and Русский.
- Game library with the three regions, version and license checks, and region flags.
- Stays open during play as the in-game options menu (
Insert/F5), so settings can be changed without leaving the game. - Pages: Games, Graphics, HUD, Saves & captures, Controls, Shortcuts, Patches, Mods, SRT, Cheats, Performance and Advanced (language, shader cache, live game log viewer).
- Optional pause when the game window loses focus.
Graphics and performance
- Render resolution: 480p, native 720p, 1080p, 1440p and 4K (3840×2160). Windowed, borderless window or fullscreen.
- Anti-aliasing: FXAA (light) or SMAA (best).
- Anisotropic filtering: 2x, 4x, 8x and 16x.
- Sharpening with AMD FSR 1 RCAS, from 10% to 100%.
- Frame limit:
- 30 FPS (original): the same experience as the PS3, where the game runs at 30 FPS.
- 60 FPS: the game logic stays at its original 30 Hz and the extra frames come from interpolating character and object poses, so the timing of the game is kept. The integrated native smoothing path is selected automatically for EU/US/JP.
- AMD FSR 3.1 Frame Generation (optional, 60 FPS mode only): up to 120 FPS when the PC holds 60 FPS.
- VSync (60 FPS mode): no tearing. It cannot be used together with frame generation.
- Performance overlay with FPS, frame time, CPU, GPU, RAM, VRAM and SPU/RSX load, in any corner.
- Persistent shader and pipeline cache, loaded in the background, with optional progress note.
- Movies (FMV) decoded with FFmpeg and ATRAC3plus audio decoded natively: no PS3 firmware needed.
SRT for speedrunners
<p align="center"> <img src="docs/images/srt-albinoid-chris.jpg" alt="SRT — Albinoid" width="880"> <br><sub>Native SRT and boss health bar during gameplay.</sub> </p> <details> <summary>View the SRT panel in detail</summary> <p align="center"> <img src="docs/images/presentation/srt-panel-boss.png" alt="SRT" width="268"> </p> </details>A native SRT (speedrun tool) overlay drawn by the game itself, toggled with F8:
- Character name and portrait, health (value, percentage and status: fine, caution, danger, poisoned, gas).
- In-game time, saves, retries and first-aid sprays (F.A.S.).
- Enemies with health bars and portraits, and boss health bars (in the panel, or centered at the top or bottom of the screen).
- Inventory with the equipped weapon, ammo and the game's own item icons, read from your game files.
- Any corner, row or column layout, inventory beside or below, size from 50% to 200%, background opacity, border, panel language, or a separate window you can place anywhere (for example on a second monitor or in OBS).
- LiveSplit official catalog: in Edit Splits → Game Name, enter exactly Resident Evil: Code: Veronica X (PS3 Recomp), then click Activate → Settings. Select Compare Against → Game Time for load removal. The optional ZIP includes ready-made Any%/S-Rank splits with icons and catalog setup instructions. Setup guide.
Practice tools, saves and items
- Archives window (
F7, enabled in Cheats): load any room or map (with the room's entry point) to practice a section, save anywhere into an independent save library with thumbnails, and load those saves at any time. - Item menu (
F6, enabled in Cheats): put any item or weapon in the current character's inventory, or take one out, without leaving the game. - Cheats: infinite health and infinite ammo, switchable during play.
- Patches: skip door animations, skip the opening logos and intro, plus your own patches in RPCS3's
patch.ymlformat. - Choose where saves are stored.
In-game RECOMP SETTINGS and character swap
<p align="center"> <img src="docs/images/recomp-settings-appearance.jpg" alt="RECOMP SETTINGS with the appearance selector" width="880"> </p>In the game's own OPTION menu, the RECOMP SETTINGS page changes resolution, anti-aliasing, display mode, brightness, contrast, saturation, sharpening (FSR RCAS) and anisotropic filtering without opening the launcher, with Reset colors to go back to the defaults.
At the top of the same page, APPEARANCE lets you play as another character model: press left/right to choose and see it in a rotating 360° preview. There are 33 options: Claire (original and alternate outfit), Chris, Steve, Wesker, 26 zombie variants and two forms of Alexia (first form and human). The chosen look is also applied when you play as Chris, Steve or Wesker. It only changes how the character looks; the story, the controls and your save stay the same.
Controls
- Xbox (XInput), PlayStation (DualShock 4 and DualSense) and Nintendo Switch controllers, plus keyboard, all at the same time.
- Vibration with an adjustable strength (0–200%).
- Any key or button can be remapped, with several keys per action.
- On-screen button icons for PlayStation, Xbox, Switch or keyboard, chosen automatically from the last device used, in HD.
Patches
The Patches page lists changes to the game's own code. They apply at once, even while the game is running.
- Skip door animations: the next room loads right away, without the door-opening animation (by Kapdap, from the RPCS3 patch list).
- Skip logos and intro: the game opens straight on the title screen, without the CAPCOM / MT FRAMEWORK logos and the intro movie.
- Your own patches: choose a folder with RPCS3
.ymlpatch files (the same format as RPCS3'spatch.yml). The patches for your game version are listed with their own switch. Patches that would change code this build was not compiled with are shown as unavailable.
Texture mods (experimental)
The port can replace the game's textures with PNG or DDS images and can also extract the original textures for you, already with the right names. Everything is on the Mods page of the launcher.
How the names work. Every texture has a code: 16 hexadecimal characters at the start of the file name, for example
1A2B3C4D5E6F7081_512x256_DXT5.png
└──── code ────┘ └size┘ └format┘
Only the code matters. A replacement can use a different resolution (a 512×256 texture can become 2048×1024 for HD), but its name must start with the same code. Packs accept .png and .dds, including mixed folders. If both use the same code, DDS takes priority.
DDS: 2D BC1/DXT1, BC2/DXT3, BC3/DXT5, BC7 and common RGB/RGBA/BGRA formats. Cutout and soft transparency are preserved; premultiplied-alpha files (including DXT2/DXT4) must be converted to straight alpha first. Compatible BC blocks remain compressed on the GPU, and supplied DDS mipmaps are used without recompression. BC7 requires base dimensions divisible by 4; small or unaligned BC1/2/3 textures fall back to RGBA. Cubemaps, arrays, volumes, HDR and other formats are not supported replacements; invalid or unsupported files leave the original texture in use.
Export: on the Mods page, choose Export format → PNG or DDS. This saved setting applies both to extraction during play and Extract textures from all maps. Full DDS extraction preserves stored DXT blocks and mipmaps; ARGB textures are exported as RGBA8 without additional quality loss. During play, DDS exports the base level: DXT stays compressed and other textures use RGBA8. Exported files still use PS3 codes and never overwrite existing files.
This support is part of the current source and requires a new build. Previously generated v1.0 distribution ZIPs are not updated automatically.
Step 1 — Extract the textures (to know the code of each one)
- Open the launcher and go to Mods.
- Choose an extraction mode:
- Extract textures from all maps: reads the game files without playing. Select it and click Start extraction. It takes a few minutes, shows its progress and can be canceled. A CSV file lists which game file each image came from.
- Dump textures from visited rooms: turn it on and play; every new texture that appears (rooms, characters, items, effects) is saved. Use it for images the game creates while running, which are not stored in the files.
- The files go to the Extracted textures folder (by default
mods\texture-dumps\<version>next to the executable). Existing files are never overwritten, so your edits are safe.
Step 2 — Make the mod
- Copy the PNG or DDS files you want to change and edit them (or upscale them) in any image editor.
- Keep the code at the start of the name. You may change the size.
- Put them in the Mod textures folder (by default
mods\textures), inside the subfolder of your version:NPEB00553,NPUB30467orNPJB00135. Without a subfolder, the folder itself is used for all versions. Subfolders inside it are allowed, so you can organize the pack as you like.
Step 3 — Use it
- Turn on Replace textures on the Mods page (restart the game if you changed the mod folder).
- In game, press F9 (controller: R1+R2+L1+L2+□ / RB+RT+LB+LT+X) to compare the mod with the original textures at any time.
- Big packs do not cost memory up front: each file is only loaded when its texture appears on screen.
[!NOTE] Ready-made HD texture pack (community). A pack of PS2 HD textures adapted to this port, for the US, EU and JP versions, is available as a separate download. It is not part of the port's download. Credits, download link and instructions: TEXTURAS-HD-COMUNIDADE.md.
[!TIP] Adapting PS2 HD texture packs. DDS files in the formats above can be used directly, without converting to PNG. Use Extract textures from all maps to obtain PS3 references, identify each matching image, and rename the pack file with its 16-character PS3 code, keeping its actual
.ddsor.pngextension. Changing an extension does not convert a file. Check cropping, orientation, transparency and image layout per texture: these may differ between PS2 and PS3. Place the files in the mod folder as in Step 2.
Notes: cube-map faces (reflections) are extracted to reference\cubemaps for reference only; replacement currently supports 2D textures. Never share the extracted original textures; share only your own edited images.
Shortcuts
On a controller, hold the four shoulder buttons first, then press the last button.
| Keyboard | PlayStation | Xbox | Switch | Action |
|---|---|---|---|---|
Insert / F5 | R1+R2+L1+L2+L3 | RB+RT+LB+LT+LS | R+ZR+L+ZL+LS | Options menu (display, audio, SRT, quit) |
F6 | R1+R2+L1+L2+△ | RB+RT+LB+LT+Y | R+ZR+L+ZL+X | Item menu (enable it in Cheats) |
F7 | R1+R2+L1+L2+○ | RB+RT+LB+LT+B | R+ZR+L+ZL+A | Archives: maps, save, load (enable it in Cheats) |
F8 | R1+R2+L1+L2+✕ | RB+RT+LB+LT+A | R+ZR+L+ZL+B | Show or hide the SRT |
F9 | R1+R2+L1+L2+□ | RB+RT+LB+LT+X | R+ZR+L+ZL+Y | Mod textures on/off |
F10 | R1+R2+L1+L2+R3 | RB+RT+LB+LT+RS | R+ZR+L+ZL+RS | Screenshot (saved in screenshots\) |
Default keyboard layout without a controller: arrows = D-pad, X = Cross, Z = Circle, A = Square, S = Triangle, I = Start, R = Select. Everything can be changed on the Controls page.
Screenshots
A few examples of the launcher and gameplay. Additional screens are collected in a separate gallery.
<p align="center"> <img src="docs/images/presentation/launcher-graphics.png" alt="Launcher and graphics settings" width="880"> </p>| Music box room | Mutant Steve |
|---|---|
| <img src="docs/images/gameplay-music-box-room.jpg" alt="Music box room" width="420"> | <img src="docs/images/gameplay-hunter-armory.jpg" alt="Mutant Steve" width="420"> |
View the complete screenshot gallery
Known issues
The port remains a work in progress. Local gameplay tests cover EU, US and JP, but a full playthrough on every hardware configuration is not verified. Graphics or compatibility issues can still occur and 60 FPS is not guaranteed on every PC. Please report the region, PC specifications, run-log.txt and what happened.
Building from source
Building is only needed if you want to work on the port. It requires your own decrypted game, because the recompiled game code is generated on your machine and is never committed.
Tools: Visual Studio 2022 or newer (or Build Tools) with the C++ workload, LLVM/clang-cl, CMake 3.20+, Ninja, Python 3.12. The FFmpeg 7.1 shared DLLs (avcodec-61, avutil-59, swscale-8, swresample-5, LGPL) are included in third_party/ffmpeg/bin/.
To install all the tools at once, open a terminal (PowerShell or Command Prompt) and run these lines. Windows downloads and installs each program; the first one installs Visual Studio Build Tools with the C++ package already selected:
winget install --id Microsoft.VisualStudio.2022.BuildTools --override "--passive --wait --add Microsoft.VisualStudio.Workload.VCTools --includeRecommended"
winget install --id LLVM.LLVM
winget install --id Kitware.CMake
winget install --id Ninja-build.Ninja
winget install --id Python.Python.3.12
Then close and reopen the terminal, go to the project folder and install the Python packages:
pip install -r requirements.txt
You only need these tools to build. To just play, download the Release zip instead.
Run the steps in this order:
- Lift the PPU code with
ppu_loaderandppu_lifterintosrc/recomp/(EU),src/recomp_us/(US) andsrc/recomp_jp/(JP). See docs/GETTING_STARTED.md. For example, for Japan:python tools/ppu_loader.py <NPJB00135>/USRDIR/EBOOT.elf -o out_jp/ python tools/ppu_lifter.py <NPJB00135>/USRDIR/EBOOT.elf --functions out_jp/EBOOT.functions.json --hle-stubs out_jp/EBOOT.imports.json --patches projects/code_veronica/patches.json -o src/recomp_jp - Generate the SPU folder with one command, from the European EBOOT (NPEB00553):
It writes the wholepython tools/cv_make_spu.py <NPEB00553>/USRDIR/EBOOT.elfprojects/code_veronica/spu/folder: the 25 embedded SPU images, the three SPURS jobs and the sound plug-in that the automatic scan cannot find, andspu_workloads.c, which registers all of them. It checks the bytes it reads against known hashes and stops with an error if the EBOOT is a different version. Without this folder the game stays on a black screen at boot. Details in docs/SPU_LIFTER.md. - Build. Run
projects/code_veronica/build-release.cmd(Europe). SetCV_BUILD_JP=1and/orCV_BUILD_US=1to build the other regions in the same run, or usebuild-release-jp.cmdfor Japan alone. The scripts find the repository from their own folder, so the clone can be anywhere; Visual Studio is found by itself (vswhere) and LLVM is expected inC:\Program Files\LLVM, where the installer puts it. Abuild-release*folder made before this change still holds the oldD:/ps3recomppaths (the scripts only configure whenCMakeCache.txtis missing): delete it once and run the script again. Processors without AVX2 (Sandy/Ivy Bridge, older Xeons, AMD FX): also setCV_BUILD_COMPAT=1to build the*_SSE4.exeexecutables (SSE4.1). The normal executables check the processor at startup and start the_SSE4one by themselves when AVX2 is missing; on AVX2 processors nothing changes. - The executables are written to
projects/code_veronica/build-release/bin/. Always use the Release build: the Debug build is far too slow for the recompiled code. projects/code_veronica/empacotar-release.cmdbuilds the release ZIP (port files only, never game data).
Running the tests
The tests run on demand through build-release.cmd, using environment variables. They use synthetic data and temporary folders, never your saves or settings. Examples:
set CV_SRT_TESTS=1
set CV_UPDATER_TESTS=1
projects\code_veronica\build-release.cmd
| Variable | What it checks |
|---|---|
CV_SRT_TESTS | SRT memory reading, layout and controller shortcut gate (EU, plus JP/US with CV_BUILD_JP/CV_BUILD_US) |
CV_MAP_TESTS | Map/room tools and dispatch |
CV_ITEMS_TESTS | F6 item menu rules and guest writes, per region |
CV_CHEAT_TESTS | Cheats in the three regions |
CV_SAVE_TESTS | Save library, in isolated folders |
CV_MENU_TESTS | In-game RECOMP SETTINGS menu navigation |
CV_FPS_TESTS, CV_POSE_TESTS, CV_POSE_GPU_TESTS | 30/60 FPS clock and pose interpolation |
CV_UPDATER_TESTS | Launcher updater, offline |
CV_FOCUS_PAUSE_TESTS | Pause on focus loss |
CV_FP_TESTS, CV_DXC_TESTS, CV_SHADOW_FILTER_TESTS | Shader translation and filters |
CV_SPU_FAULT_TESTS, CV_SPU_POOL_TESTS, CV_SPU_SCHEDULE_TESTS | SPU runtime |
Other test targets (for example code_veronica_launcher_cache_tests) are listed in projects/code_veronica/CMakeLists.txt and can be built with cmake --build build-release --target <name>.
Repository layout
| Path | Contents |
|---|---|
projects/code_veronica/ | The port: launcher, SRT, tools, renderer hooks, build scripts and design notes |
projects/code_veronica/livesplit/ | LiveSplit autosplitter with port support |
runtime/, libs/, tools/, include/ | The ps3recomp runtime, PS3 library reimplementations and recompiler tools |
third_party/ | FFmpeg, ATRAC3 decoder, SMAA and AMD FSR 3.1 |
docs/ | ps3recomp documentation and the images of this README |
| README-ps3recomp.md | The original ps3recomp README |
Credits
Port: made by Kastiel.
Development assistance: the port was developed with the help of AI assistants: Claude (Anthropic) and Codex (OpenAI).
Foundation
- ps3recomp by sp00nznet (Ned Heller) and its contributors: the static recompilation toolkit and runtime this port is built on (MIT).
- RPCS3: the PS3 emulator, used as the reference for hardware and system behaviour, for frame-by-frame comparisons and for its
patch.ymlformat.
Libraries and assets
- FFmpeg (LGPL 2.1 or later): MPEG-2 movie decoding.
- ATRAC3/ATRAC3plus decoder from FFmpeg, as extracted by PPSSPP (
at3_standalone, LGPL 2.1 or later). - AMD FidelityFX FSR 3.1 frame generation runtime (AMD license) and AMD FSR 1 RCAS/EASU.
- SMAA by Jorge Jimenez, Jose I. Echevarria, Belen Masia, Fernando Navarro and Diego Gutierrez (MIT).
- FXAA 3.11 by Timothy Lottes (NVIDIA).
- stb_image and stb_image_write by Sean Barrett (public domain / MIT).
- GitHub Octicons (MIT), for the GitHub mark in the launcher.
Resident Evil community
-
Kapdap: re-cvx-srt-provider (MIT), whose memory addresses and game-state rules were studied for the SRT; the Code: Veronica autosplitter (MIT) that the included LiveSplit script extends; and the door-skip patch from the RPCS3 patch list.
-
aikatore and contributors: recvx-enhanced-port (MIT), for room location labels and as a reference for in-between frames.
-
HD texture pack (optional download): textures by ewgeha, SonicB00M and JuanchoTexHD, adapted to the PS3 version by Kastiel. Full credits and links: TEXTURAS-HD-COMUNIDADE.md.
Capcom created Resident Evil Code: Veronica. Please support the official releases.
The full license texts are in THIRD-PARTY-NOTICES.md.
License
The port code and ps3recomp are released under the MIT License — see LICENSE. Third-party components keep their own licenses, listed in THIRD-PARTY-NOTICES.md. The license does not cover the game: Resident Evil Code: Veronica X and its assets belong to Capcom, and you must own the game to use this port.