
Super Mario Sunshine · sms launcher (chasem-dev)
Super Mario Sunshine
OriginGameCube
TechnologyNative C/C++ port (engine reimplementation)
Available forWindows, Linux, macOS
View official projectAbout the project
Super Mario Sunshine es un videojuego de plataformas japonés de 2002 desarrollado y publicado por Nintendo para GameCube. Es el segundo juego en 3D de la serie Super Mario, después de Super Mario 64 (1996). El juego fue dirigido por Yoshiaki Koizumi y Kenta Usui, producido por los creadores de la serie Shigeru Miyamoto y Takashi Tezuka, escrito por Makoto Wada y musicalizado por Koji Kondo y Shinobu Tanaka.
8 versions of Super Mario Sunshine
You're viewing: sms launcher (chasem-dev)
sms launcher (chasem-dev)github.com/chasem-dev/sms-launcher SunPad (Super Mario Sunshine iOS/macOS)github.com/chrissotraidis/sunpadSuper Mario Sunshinegithub.com/chasem-dev/sms-pc-portAndroid Port (Player124413)github.com/Player124413/sunpad-android-editonSuper Mario Sunshine (Android)github.com/jbcgames/sms-androidSuper Mario Sunshine (doldecomp)github.com/doldecomp/smsSuper Mario Sunshine (Native PC Port)github.com/TekRantGaming/sms-pc-portSuper Mario Sunshine (PS5)github.com/griches/PS5_Sunshine
Official project information
SMS Launcher
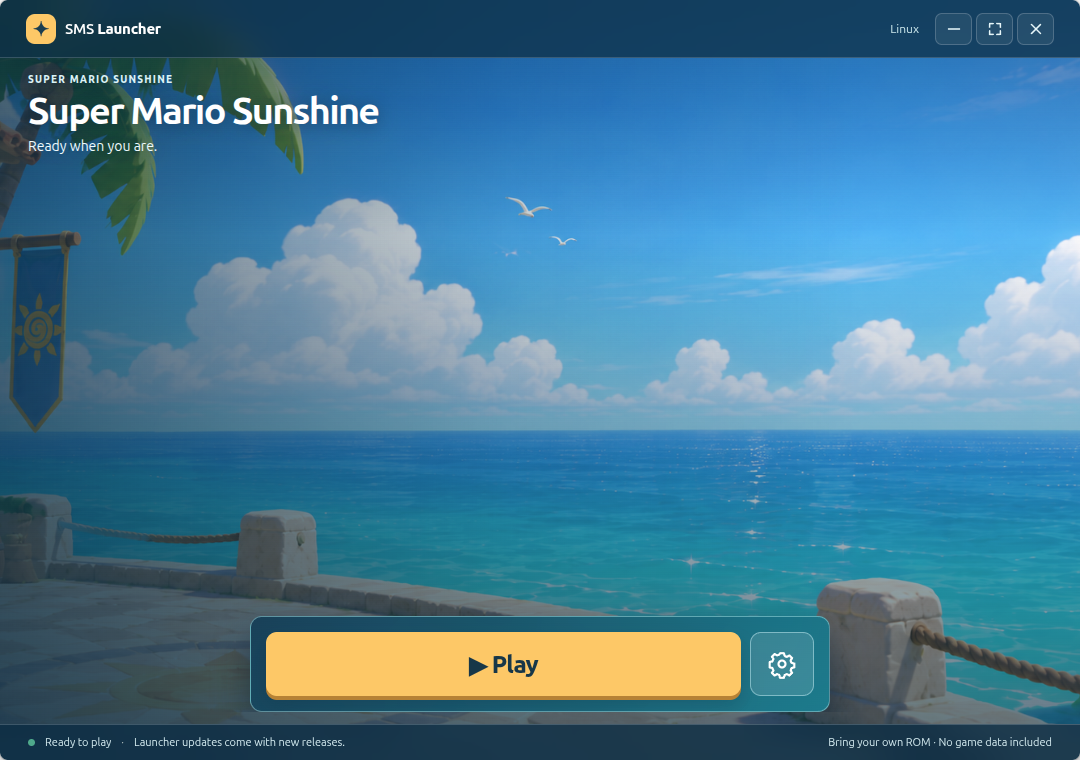
Set up and play Super Mario Sunshine on Windows, macOS, and Linux. SMS Launcher guides you through setup, downloads the tools it needs, and gives you one big Play button when you're ready.
Bring your own ROM is required. You need a disc image made from your own supported Super Mario Sunshine disc. The launcher does not include a game or disc image.
Download
Download SMS Launcher from the latest release
Choose the launcher file for your computer:
| Your computer | Download |
|---|---|
| Windows | The .exe installer, or SMS-Launcher-<version>-win-portable.exe for the portable version |
| Mac — Intel or Apple Silicon | SMS-Launcher-<version>-mac-universal.dmg |
| Linux | SMS-Launcher.AppImage |
The launcher requires a 64-bit computer and an internet connection for setup. Required setup tools download automatically.
Install
Windows
Open the .exe installer and follow the steps, then open SMS Launcher.
Portable version: put SMS-Launcher-<version>-win-portable.exe in any folder, such as on a USB drive, and open it. Nothing is installed. The first time it runs, it creates an SMS-Launcher-Portable folder next to the .exe, and keeps everything there: settings, setup files, build tools, the game, its shader and HD texture caches, saves, and save backups. It doesn't ask where to set up. You can move or copy the .exe and that folder together, to another drive or another computer, and keep playing without setting up again. The game reads your disc whenever it runs, so keep your disc file next to the .exe or in SMS-Launcher-Portable and move it along: if the disc you chose isn't on the new computer, the launcher uses the one it finds there. Otherwise, choose your disc again under Settings. Portable versions don't update themselves. To update, download the new portable .exe and put it in place of the old one, next to the same SMS-Launcher-Portable folder. Each portable start takes a few seconds while the launcher unpacks itself.
Mac
- Double-click the
.dmg. - Drag SMS Launcher.app onto Applications in the window that opens.
- Eject the disk image, then open SMS Launcher from Applications.
Use the DMG for the usual drag-and-drop installation. If you download the ZIP instead, move the extracted app into Applications before opening it.
Linux
Download the .AppImage, allow it to run as a program in your file manager's permissions settings, then open it.
To play through Steam (on a Steam Deck, in Desktop Mode), choose the Add to Steam banner on the home screen; see Add to Steam. Launcher updates install over the AppImage in place, keeping its name and folder, so the Steam shortcut and any desktop entry keep working.
Set up your game
The launcher walks you through three steps:
- Download setup files. Use the suggested location, or choose a different folder before downloading.
- Choose disc image. Select a copy of your own original North American Super Mario Sunshine disc — GMSE01, revision 0. Supported files are
.iso(NKit.isotoo),.gcm, and Dolphin.ciso. The launcher checks the file's contents when you choose it: it names RVZ, WIA and GCZ images (convert them to a full.isofirst), archives, other regions and other games, and catches an incomplete copy before anything is built. - Begin setup. The launcher downloads HD textures and prepares your game on your computer. This first setup can take a while.
On Mac, setup may ask you to install Apple's Command Line Tools and, on Apple Silicon, Rosetta. Follow Mac setup help in the launcher.
The progress bar shows what's happening. View build log opens more detail; closing that view keeps setup running.
When setup finishes, press Play.
Play and change settings
After setup, the main screen is just Play and the Settings cog beside it. The game opens in a centered, resizable window.
Open Settings to change screen format, smoothness, resolution, and HD textures. Changes take effect the next time you start the game.
On Windows, macOS, and Linux, the defaults are 64-bit, HD textures on, 4× resolution, icons at the screen edges, and 60 fps gameplay. Existing users keep their saved settings.
Settings → Display → Frame rate offers 30 fps (GameCube native), 60 fps (default), and 120 fps (optional). The previous 60 fps switch migrates to 30 or 60 without changing your saved preference. 120 fps stays available on every display; it needs more CPU/GPU performance, and a display running at 120 Hz or faster shows its full benefit. Logos, menus, and movies stay at 30 fps.
Turn on Settings → Display → Fullscreen to have the game fill your display on its next launch. Fullscreen type chooses Borderless (the default) or Exclusive, which switches your display to the Fullscreen resolution while the game runs (for example 1920×1080 on a 4K screen). Monitor opens the game on the same monitor as the launcher or on the primary one. F11 or Alt+Enter switches full screen while playing.
The launcher also works with a game controller. Move with the left stick or d-pad and press A to select. On a list, A steps to the next choice and X steps back; on a slider, left and right change the value. Press B to go back (to Play, from any other page) and Start to open or close Settings. LB/RB move between the launcher's tabs, or between the Settings tabs on Settings, View/Select shows or hides the activity log, and the right stick scrolls. The launcher ignores the controller while the game is running and while Controls waits for a button to bind. Choosing a file or folder still opens your system's file picker, which needs a mouse or keyboard.
Settings → Display also has Aspect ratio (keep the picture's shape, stretch it, or whole multiples of the original size), Brightness, V-Sync (Off, On or Adaptive) and Performance overlay, which opens the game's frame-rate overlay at start (the backtick key toggles it in game).
Graphics preset sets them all at once, the way PC games do: Low, Medium, High or Ultra set resolution, anti-aliasing, FXAA, anisotropic filtering, sharpening, upscaler and the heat-wave effect, and Steam Deck suits the Deck's 1280×800 screen (2×, 16:10, full screen). Changing any of those yourself switches it to Custom. If the frame rate still drops, try a lower screen resolution: set Full screen type to Exclusive and choose a lower Exclusive resolution.
Settings → Display → HDR (Windows) turns on HDR output for an HDR display (turn on Windows HDR first). Use Windows HDR calibration takes peak brightness from your Windows HDR Calibration profile and paper white from Windows' SDR content brightness, and the panel shows what Windows reports for your display; turn it off to set Paper white and Peak brightness yourself. Contrast, Saturation and Highlights (how far the brightest parts climb toward the peak) shape the picture.
Settings → Graphics has Anti-aliasing (MSAA 2×, 4× or 8×), FXAA, Anisotropic filtering (2× to 16×), Sharpening, Upscaler (bilinear, sharp, nearest, FSR 1, AMD's upscaler, or NIS, NVIDIA Image Scaling: their Upscaling quality, Native, Quality, Balanced, Performance or Ultra Performance, renders at 100%, 67%, 59%, 50% or 33% of your screen's resolution and upscales the rest with clean edges, in place of Picture sharpness; both work on any graphics card) and Heat-wave effect, which turns off the wavy shimmer in hot, sunny areas. All of them are off or unchanged by default (the heat-wave effect stays on).
Settings → Gameplay → Invert camera X / Y flip the C-stick camera left/right and up/down. Both are inverted by default. Free camera keeps the camera where you point it instead of swinging back behind Mario (L recentres it). Camera speed scales how fast it turns. Mouse look turns it with the mouse (F10 releases the mouse, a click takes it back) at the chosen Mouse sensitivity.
Settings → Gameplay → Volume sets the game's master volume, from 0 to 100% (full by default). It takes effect on the next launch. Skip cutscenes there skips every movie, including the intro. Skip intro starts the game at the title screen, without the Nintendo and Dolby logos or the opening movie (A skips each of them anyway). Pause menu tracker shows an area's Shine Sprites and blue coins in the pause menu, got out of all there are, with L and R to switch areas; it is on by default (Super Mario Eclipse has its own tracker instead). Radar shows a round map at the top right while you play: the area close around Mario, north up, with an arrow for the way he faces and the area's Shine Sprites and blue coins on it. It is off by default. Auto Save saves by itself after Shine Sprites, blue coins, nozzle boxes and Yoshi instead of asking, with a Shine turning at the bottom left while it saves and the game's save sound when it's done. It is on by default. When the game can't save without asking (no save file yet, or a file saved over elsewhere), the usual prompt opens; a game over still asks. Super Mario Eclipse keeps its own Save Prompts setting.
- Manage game has game updates, rebuilding, the setup folder and disc file, the game build, and space cleanup.
- Saves backs up and restores your saved games, imports Dolphin saves, and lists your save states.
- Controls sets the keyboard keys and controller buttons for each GameCube button. Switch between Keyboard and Controller at the top; Change uses one key or button (press it, or hold two controller buttons together for a pair like L1 + R1), Add adds another, Reset goes back to the default. Controllers work without any setup. If pressing a button doesn't register (the launcher can't see some controllers the game reads, like a Switch Pro Controller), pick the button from the list in that row instead; a Switch controller's A, B, X and Y are the letters printed on it. Soft L press and Soft R press have no keys by default: bind them for a light trigger press without the click (for example, spraying FLUDD on the move), and set how far with Soft trigger depth. Rumble strength sets how hard your controller rumbles: 50% (the default) matches the console, higher runs the motor more often so light rumbles feel stronger, and 0% turns it off; the controller rumbles as you move the slider so you can feel it. Controller works in the background (off by default) keeps the game reading your controller while another window has focus, for example with the game on a second screen while you use the mouse and keyboard elsewhere; off, the game ignores input until its window has focus again. Button prompts picks the buttons the game shows in its text and on the FLUDD gauge: Original (GameCube) (the default), Xbox, PlayStation 5, Steam Deck, Nintendo Switch, PC keyboard and mouse, or Automatic, which switches between keyboard and controller as you play; with Automatic, Prompt controller can show one style on any controller (PlayStation prompts on an Xbox pad, say), and Match my controller shows Nintendo prompts for Switch controllers. Nintendo button layout is for a controller printed like Nintendo's (A on the right, B at the bottom, X on top, Y on the left) that the game reads as an Xbox pad, as many third-party ones are: with it on, each button does what its letter says, in the game and in the launcher's menus, and Match my controller shows Nintendo prompts. Switch controllers already work this way. The prompts follow your bindings, so a remapped key or button shows as you set it, and a preview shows them. On SteamOS or a Steam Deck, if buttons do two things or your controller buttons don't apply, turn off Steam Input for SMS Launcher (Steam → Properties → Controller → Disable Steam Input); the Controls tab explains this on Linux. A GameCube adapter in Wii U mode (Nintendo's official adapter, or a Mayflash or similar with its switch on Wii U) is read by the game itself and plays exactly as on a GameCube, so the controller buttons set here don't apply to it, and the launcher's menus can't be driven with it. While one is plugged in, the Controls tab says whether the game can open it. On Linux that needs a udev rule, as for Dolphin: Allow access adds it (it asks for your password), or Copy terminal command gives you the command to run yourself, for example on a Steam Deck with no password set.
- Launcher has Dark mode (dark Settings, changelog and other launcher windows), launcher updates, Discord and usage sharing, and shows your launcher, game, and setup tool versions for support.
Windows and Linux offer both 64-bit and 32-bit game builds. Keep the default 64-bit choice unless you need 32-bit. Mac game builds are 64-bit.
HD textures
HD textures are on by default for first-time setup. In Sunshine mode, this also installs all 21 enhanced cutscenes at 3× resolution, preserving their timing and original audio. Textures use about 1 GB to download and 3 GB installed; the movie patches add about 5.7 GB to download and 5.8 GB installed. Movie setup needs about 7.8 GB free, plus room for textures if needed. You can turn HD visuals off in Settings → Graphics. Existing users keep their saved choice.
If HD setup is incomplete, choose Finish HD setup to download and prepare the missing files. Previously installed textures and movies are reused. The launcher shows download progress and checks all movies before activating the pack. Failed or cancelled setup keeps the previous pack. Your original disc and saves stay intact. Eclipse keeps its own movies.
With Super Mario Eclipse on, HD textures also bring Eclipse's own: iZePlayzYT's Super Mario Eclipse HiRes Texture Pack, about 9 GB to download and 16 GB installed, downloaded before Eclipse plays. It unpacks as it downloads, so it never needs room for the zip as well; a stopped download carries on from where it stopped, and every game version shares one copy. Until it is installed, or if your drive has no room for it, Eclipse plays with Sunshine's HD textures.
Settings → Graphics → HD texture loading chooses when HD textures load:
- Before each level (default): a level's textures load while it loads, so they don't appear late while you play.
- Whole pack: the rest of the HD textures load during the first few loading screens and all of them stay loaded, so after that none load at all. This needs a graphics card with at least 6 GB of memory.
- While playing: each texture loads the first time it appears, which uses the least memory. The original texture shows until the HD one is ready.
The first time each HD texture is used, the game also builds its smaller versions for distant surfaces, in the background at low priority, and keeps them for later sessions (about 1 GB once you've seen the whole game).
Shader warm-up (on by default) builds the graphics effects each level is known to use while the level loads, instead of the first time they're drawn. Without it, the first moments in a new level stutter on the first play on each computer. Turn it off to load levels slightly faster on the first play.
Language
Settings → Gameplay → Language plays the game in English (the default), Français, Deutsch, Español, Italiano, Polski or Português (Brasil).
French, German, Spanish and Italian come from the European release: dialogue, cutscene subtitles, menus, the HUD, the title screen and the memory card screens. Polish is a community translation of the text; its menus and pictures stay in English. Brazilian Portuguese is a community translation made for Super Mario 3D All-Stars, with all of the text and the menu, pause and Yes/No pictures in Portuguese; its other pictures stay in Spanish.
Each is a small pack (about 1 MB) that the launcher downloads before the game starts. The list comes from the launcher's src/language-packs.json, so a new language needs a new pack release and a launcher update, not a game update (the game needs to be one that plays any language pack; an older one shows "Update the game to play in …").
You still use your North American disc, and your saves work in every language.
Super Mario Eclipse plays in English.
Updates
When a game update is ready, the main button becomes Update & play (or stays Play with Update automatically off). The ▾ beside it opens the other choices: Update only installs the update and stays in the launcher, and Play now starts your installed version without downloading or rebuilding. Your current game stays available until the new setup succeeds.
If optional HD downloads are unfinished, Play installed version also lets you play now using the packs already installed. Missing HD packs stay off for that launch; your visual preferences remain saved for later setup.
Launcher updates download automatically when Update automatically is enabled and install when you quit. If automatic updates aren't available for your installation, download and install the latest launcher from the releases page.
To manage updates yourself, turn off Update automatically in Settings → Launcher. Use Update game in Settings → Manage game when you're ready.
After the launcher updates, its changelog opens once to show what changed in the launcher and the game since you last opened it. Open it any time with the What's new tab.
Join the Beta
Beta has the newest launcher and the newest game before they are released. It is rebuilt whenever either changes, so you get fixes and new features sooner, but it is for testing and may break. What Beta has that no release has yet is at the top of the changelog.
- Open Settings (the cog), then the Launcher tab.
- Under Updates, set Launcher updates to Beta.
- The launcher downloads the Beta straight away. Choose Install now in the status bar, or it installs when you quit.
Once you're on Beta, new Betas arrive like any other launcher update. If Beta has a newer game than yours, the main button becomes Update & play.
To leave, set Launcher updates back to Stable: the launcher goes back to the latest release the same way. The portable Windows launcher (the win-portable.exe) never updates itself, so Settings has no Launcher updates for it. To try Beta with it, download the win-portable.exe from the Beta release into the same folder as your portable launcher, so it uses the same SMS-Launcher-Portable folder with your settings and setup, and open that one. Download a new one for each Beta; to go back, open your Stable .exe again. The same list offers pull request previews, single changes being tested before they reach Beta; they're only there while that pull request is open.
Start the game from Steam
The Add to Steam banner sets this up for you when you turn on Skip Launcher. To go straight into the game from Steam or another shortcut yourself, add --play to the launcher's launch options (in Steam: Properties → Launch Options; on Linux keep --no-sandbox too, as in --no-sandbox --play). The game starts with your launcher settings, without the launcher's window, and Steam shows it running until you quit. Your saves are backed up before and after, as they are when you press Play.
--play never downloads or builds anything. If the game needs setup, an update (with Update automatically on), or HD downloads, or if it closes with an error, the launcher opens instead so you can see why. Launcher updates are only checked while the launcher is open, so open it now and then.
Saved games and backups
The launcher keeps your save location when you update or rebuild the game. It makes dated backups before and after playing, and before game updates or cleanup.
On the Saves & states tab, you can:
- Import a Dolphin save: drop a
.gcifile into the Saved games panel, or choose Choose .gci file. Confirm the import, then start the game. - Back up saves whenever you want an extra copy.
- Open backup folder to find your backups.
- Choose an earlier backup and select Restore backup. Your current saves are backed up before restoring.
- Turn off Back up automatically to stop the backups before and after playing and before game updates or cleanup. Back up saves still works, and restoring a backup or importing a Dolphin save still backs up your current saves first.
Backups are stored in SMS Launcher Backups in your home folder, separate from the launcher installation and game build folders. Copy that folder to another drive or cloud storage for extra protection.
Save states
A save state is the exact moment you're in. In a level, press L1 + R1 (LB + RB) together on a controller, or F5, to save one. To go back, pause: the pause menu shows those buttons at its top right with LOAD SAVE STATE, and pressing them there lists your states, newest first, with a picture of each. F6 loads the newest without the menu. Change these under Settings → Controls (Save a state and Load the newest state).
A state loads exactly, with everything where it was, in the game build that saved it. A state from another build (after a game update, or from someone else) takes you to the same level and spot instead, and the list marks it "position". Loading a state brings its progress too, so saving to the memory card afterwards saves that progress.
States are .smsstate files in a savestates folder next to your memory card folder. The Saves & states tab lists them with their pictures. From there, Import a state adds states others send you, Show file finds one to share, Delete removes one, and Open save states folder opens the folder. Save states are not part of save backups.
Export your North American Super Mario Sunshine save (GMSE01, super_mario_sunshine) from Dolphin's Memory Card Manager as a .gci file. The importer transfers the entire save, including all three slots. It installs the unchanged save data and the card metadata into the save folder shown in the launcher, including custom locations, on Windows, macOS, and Linux. A fresh card does not need to be created in-game first. Other games, regions, raw memory cards, and .sav/.gcs files are not supported.
Add to Steam
The Add to Steam banner on the Play page adds the launcher to your Steam library as a non-Steam game called Super Mario Sunshine, with artwork from SteamGridDB: the library capsule, wide capsule, header, logo and icon. You can then start it from Steam, Big Picture, or a Steam Deck's Game Mode. On a Steam Deck, add it from Desktop Mode.
- It first asks whether to Skip Launcher. With it on, the shortcut gets
--play, so Steam starts the game straight away (see Start the game from Steam); turn it off to open the launcher from Steam instead. Your other launch options are kept. - If Steam is open, it closes for a moment, because Steam picks up new non-Steam games only when it starts. On Windows it opens again afterwards; on Linux and the Steam Deck, open Steam again yourself once the launcher says it was added.
- The launcher is added for the Steam account that signed in last (the latest sign-in in Steam's
config/loginusers.vdf). Choosing it again updates the same entry instead of adding another. - Your other non-Steam games are kept exactly as they were: the launcher checks the new list before saving it, and changes nothing if any game would be missing.
- Steam's list of non-Steam games is backed up before Steam closes, as
shortcuts.vdf.sms-launcher-backupbeside it, for every account folder in Steam'suserdata(inuserdata/<account>/config; Steam's folder is~/.local/share/Steamon Linux and the Steam Deck). That first copy is never replaced; a list that changed since gets another copy with the date and time in its name. To put a list back, exit Steam, copy the backup overshortcuts.vdf, and start Steam. - The list keeps its file permissions when the launcher saves it, and so do its backups. NonSteamLaunchers marks the list executable and empties one that isn't.
- Steam writes its list again as it closes. If that list has fewer games than before, the launcher puts the list from before back, keeps Steam's shorter one as a dated backup, and stops without adding itself. The activity log shows how many non-Steam games each account folder had before and after Steam closed.
- The artwork is not part of the launcher. It downloads from SteamGridDB when you choose Add to Steam and is saved only in Steam's artwork folder.
- The banner shows on Windows and Linux, from the installed launcher or the AppImage, while Steam is installed and the launcher is not in its library yet.
The launcher asks before importing, warns if save block checksums fail, and makes a verified backup of your existing card before writing. A failed import restores the files it replaced. Import is disabled while the game or another launcher task is running. The source .gci is never changed or uploaded. Restore a Before Dolphin import backup to recover previous progress.
The conversion follows the GCI header/payload approach demonstrated by the community GCI-to-DAT converter, with metadata and index creation for the port's card backend. Header fields follow Dolphin's GCI directory entry format.
Optional: Super Mario Eclipse
Super Mario Eclipse is a fan-made expansion available in Settings. Enable it and choose Install Eclipse mod, then finish any setup the launcher requests. Turn it off to return to the original game.
Eclipse needs a full, unmodified North American ISO; compressed CISO files won't work for its patch. Eclipse has been verified on Linux and is experimental on Windows and Mac.
Privacy
The top bar shows how many players have the launcher open. To count you, the launcher sends an anonymous check-in every 5 minutes while it is open. It contains only:
- the launcher version, installed game version and the game version this release offers
- your OS and processor type (for example
win32,x64) - your launcher update channel
- whether the game is running
- a random install ID made on first run
Nothing else is sent: no name, account, disc file, saves, settings or file paths, and no IP address is stored. Installs that stop checking in are deleted after 90 days. Turn off Share anonymous usage in Settings → Launcher to stop sending check-ins; you will still see the online count, but you won't be counted in it.
While the game runs and the Discord app is open on the same computer, your Discord profile shows that you are playing: the level and episode, your Shine and Blue Coin counts, lives, whether you're paused, and how long you have played. This goes only to the Discord app on your computer, and it clears when the game closes. Turn off Show on Discord in Settings → Launcher to hide it.
Need help?
The Activity log button at the right of the status bar opens the log on any page, as a panel under the page that pushes it up; ✕ or the button again hides it, and the expand button gives it the page's whole height. A task shows its progress under Play and in the status bar without opening the log (View build log opens it); the log opens by itself when something fails. Launcher messages, stdout and stderr have separate labels and colors. Stderr also carries normal game diagnostics; its label alone does not mean a crash. Scroll up to pause following output, and click Follow output to catch up again. Each fresh Play clears the activity window and replaces the stored session log before any setup or launch steps. Use Copy log to copy the full current session to your clipboard or Save log to export it to a file, including output older than the latest 700 visible entries. The current session is also kept in the launcher's user-data logs folder. The launcher closes stdin for its tasks; this view does not accept terminal input.
Game failures report the actual exit code or signal, without treating resource warnings or stage context as the crash cause. Windows games start directly so their native exception status is preserved. Setup failures can still quote a compiler or installer diagnostic.
- Setup or a download failed: open View activity on the error message to see what happened, then try setup again. A failed HD download leaves Finish HD setup available to retry.
- A game update failed: use Play installed version in Manage game. After a successful update, Play previous version is also available there.
- Mac says the launcher is on a read-only volume: quit the launcher, move SMS Launcher.app into Applications, eject the DMG, and reopen it from Applications.
- Need to free up space: use See removable files in Manage game, then Free up space. The launcher keeps your disc file and saved games. Free up space also clears the compiler cache (up to 2 GB) and the downloaded Super Mario Eclipse sources, so the next build takes longer.
For developers
SMS Launcher is an Electron frontend for sms-pc-port. Game preparation stays on the user's computer and requires their own disc image.
Run locally
Install Node.js 22.12 or newer and npm, then:
git clone https://github.com/chasem-dev/sms-launcher.git
cd sms-launcher
npm ci
npm start
For development alongside the port, use sibling folders:
workspace/
├── sms-port/
└── sms-launcher/
Development runs detect a neighboring sms-port/ automatically. Packaged installs use the launcher's data folder by default. Existing setup folders can be selected in Settings → Game files.
Test and package
npm test
npm run dist
To make a universal Mac package on macOS:
npm run dist -- --mac --universal
Packages contain the launcher. Game source, disc images, optional mods, compiled games, and saves are not bundled.
The separate Game build workflow (game-build.yml) downloads checksum-verified tool archives and compiles the exact source in src/game-release.json without a ROM, as the launcher does for players: 32-bit and 64-bit games on Windows and Linux, x86_64 games on Intel and Apple Silicon Macs and the arm64 game on Apple Silicon, and Super Mario Eclipse on all three, each started far enough to reach its disc check. It is the gate before every release and every Beta (which builds Beta's newer game instead), and sms-pc-port's required Launcher build check runs it for each game pull request and commit to main. A launcher pull request runs it only when it changes something the build uses (scripts/game-build-files.js lists those files); otherwise its check passes at once. It also runs weekly. It does not publish game binaries.
The Refresh Beta workflow keeps the Beta update channel current: every push to main rebuilds it (publishing only once its game passes Game build), and every hour it is rebuilt if the game's branch or the launcher's build has new commits. The hourly check skips launcher commits that change nothing packaged into the launcher (anything outside src/, build/, package.json, package-lock.json, changelog.json and the packaged scripts), such as docs, tests and workflows, and game commits that change only the game's CI, docs and tests (.github/, docs/, tools/tests/ and Markdown files). To push such a commit without rebuilding Beta at all, put [skip ci] in its message. Beta uses the newest commit of the game's branch, not the commit src/game-release.json pins for the next Stable release. To rebuild it right away, run Refresh Beta in GitHub Actions (or gh workflow run refresh-beta.yml).
Each published Beta is announced in Discord when the DISCORD_BETA_WEBHOOK repository secret holds a channel webhook URL (in Discord: the channel's Edit Channel → Integrations → Webhooks → New Webhook → Copy Webhook URL, then gh secret set DISCORD_BETA_WEBHOOK). The message has the launcher and game versions, links to the release and both commits, and the notes added to Beta in changelog.json since the last Beta (all of them if the last Beta's notes can't be read). Without the secret, or if Discord is unreachable, Beta still publishes.
Build tools
The launcher checks available tools and downloads prepared archives when needed. Downloads are checksum-verified and stay in its private data folder. Users do not need to install Git, Homebrew, or MSYS2 themselves.
| Host | Prepared tools |
|---|---|
| Linux x64 | Git, CMake, Python, GCC, SDL2, EGL, Make, patch, binutils, 7-Zip, and an x64-host 32-bit cross compiler with its SDK and graphics libraries |
| Windows x64 | A prepared MSYS2 tree with 64-bit helper programs and compilers for both 32-bit and 64-bit games |
| Mac Intel / Apple Silicon | Native LLVM, CMake, Python, Git, Make, patch, and 7-Zip; Apple's Command Line Tools and Rosetta are installed separately when required |
Your own MSYS2 (Windows, advanced). Set the environment variable SMS_MSYS2_ROOT to an MSYS2 folder (the one containing usr and mingw64) and restart the launcher. It then uses that MSYS2 for every build and never downloads its own Windows tools. This is for setups the prepared tools cannot run on, such as Windows 7 with the last MSYS2 that supports it. Install the packages from MinGW64: pacman -S --needed mingw-w64-x86_64-gcc mingw-w64-x86_64-cmake mingw-w64-x86_64-SDL2 mingw-w64-x86_64-ninja mingw-w64-x86_64-make mingw-w64-x86_64-python patch git. Git is found in that MSYS2's usr\bin first, then on your normal PATH; on Windows 7, delete that MSYS2's usr\bin\git.exe and install Git for Windows 2.38.1 instead. Only 64-bit games are supported this way; Super Mario Eclipse needs clang, and HD textures need 7z on the PATH. Unset the variable to go back to the prepared tools.
Removing them (Windows). The tools take a few GB and are only needed to build the game: the Windows game has every DLL it imports beside it. Settings → Manage game → Remove build tools deletes them, and the launcher downloads them again the next time it builds or sets up the game. On Linux and macOS the game loads libraries from the tools, so they stay.
Tool archives are separate release assets, with source archives and package notices. Matching versions are reused. Changed archives install into separate folders, preserving tools needed by earlier game builds. Each game build records its tool location.
See build tool publishing for archive preparation and publishing.
Versions and releases
| Component | Version location | When it changes |
|---|---|---|
| Launcher | package.json | Launcher behavior, UI, or selecting a new game/tools release |
| Game source | src/game-release.json | A tested port commit and its exact decomp commit |
| Build tools | Platform entries in src/tool-assets.json and src/mac-tool-assets.json | When that OS or architecture needs different tools |
Source or tool changes require a game rebuild. Visual preferences and launcher-only updates reuse the existing game. The launcher selects compatible versions; users don't manage branches or commits.
Changelog: changelog.json has one entry per launcher release: its launcher changes and the game it pins (game.version and game.commit from src/game-release.json) with that game's changes. Write entries for players. The launcher reads the file from main on GitHub, so later edits to an entry reach installed launchers, and falls back to the copy it was packaged with when offline. Tests require an entry for the current package.json version whose game pin matches src/game-release.json. AGENTS.md has the rules for keeping it current, written for AI coding agents and people alike.
Launcher release: run npm version patch --no-git-tag-version, add the new version to changelog.json, commit package.json, package-lock.json and changelog.json, and push to main. The release workflow creates the tag and draft, verifies the game with the published tools, builds the Linux AppImage, universal Mac DMG/ZIP, and Windows installer, then publishes after all checks pass. Documentation-only changes don't need a version bump.
Game update:
- Push a complete port revision, including its decomp gitlink, to the branch selected in
src/game-release.json— currentlymain. - Run
npm run update:gameornpm run update:game -- <port-commit>. It records exact source revisions, assigns a dated game version, bumps the launcher version, and drafts that version'schangelog.jsonentry with the game pin and the port and launcher commit subjects since the last release. Selecting the same revision makes no changes. - Rewrite the drafted changelog notes for players, review and commit
src/game-release.json,package.json,package-lock.jsonandchangelog.json, then push tomainto run the release gate.
Tool update: publish the affected OS or Mac architecture through the separate tool workflow, adopt its generated manifest entry with the new immutable URL and checksum, and bump the launcher. Preserve existing archives and hashes. See the toolset workflow.
Launcher updates and Mac signing
Release packages embed their GitHub update feed, check on startup and every 30 minutes, and install downloaded updates on quit. The Mac ZIP is required by the automatic updater; the DMG is the recommended user installation.
macOS automatic updates require signed builds. Mac releases are signed with a self-signed certificate: run scripts/make-mac-cert.sh once, store its output as the MAC_CSC_LINK and MAC_CSC_KEY_PASSWORD secrets, and back it up. Installs only accept updates signed with that same certificate, or a later Developer ID build of the same app, so never generate a replacement. Without the secrets, builds are unsigned and can only be installed by hand. Windows signing uses WIN_CSC_LINK and WIN_CSC_KEY_PASSWORD. SMS_LAUNCHER_UPDATE_URL can override the embedded feed with an HTTPS generic feed. Local packages without a feed cannot fetch new launcher releases automatically.
Usage API
Check-ins and the online count come from sms-server-api, a Cloudflare Worker kept in a separate private repository. TELEMETRY_URL in src/telemetry.js points packaged launchers at it (https://sms-launcher-telemetry.chasemdev.workers.dev). Development runs never report unless SMS_TELEMETRY_URL points at a test API, for example SMS_TELEMETRY_URL=http://localhost:8787 npm start with the API's npm run dev.
Save storage and recovery
The launcher honors SMS_SAVE_DIR or save_dir in the port's settings.txt and displays the resolved path. Verified backups live outside the launcher and port folders in ~/SMS Launcher Backups.
Source updates build in separate folders and switch preferences only after success. Each build compiles through ccache (src/compiler-cache.js: its own release, pinned by SHA-256 and downloaded on first use, in compiler-cache/ in the launcher's data folder, up to 2 GB), with paths hashed relative to the game folder being built, so a new version's folder or the Eclipse build reuses every object whose sources didn't change; without it the game builds as before, and a player's own SMS_COMPILER_CACHE (empty for none) replaces it. Super Mario Eclipse's sources are downloaded once into eclipse-sources/ (the game's SMS_ECLIPSE_GIT_CACHE), or beside the game folder as <game folder>.eclipse-sources when that is on another drive, since the game copies them from there by a relative path. After a successful build, toolsets no kept game version was built with, and interrupted tool downloads, are removed. Rebuilds preserve the previous binary and metadata; a recovery journal restores interrupted builds on the next start. Cleanup refuses custom save folders inside removable build output. Restore verifies the backup and saves current progress first. Disc images and patched discs are not included in save backups. A single-instance lock prevents overlapping updates and save operations.
HD cutscene integration
The HD textures switch controls both textures and Sunshine's complete movie pack. Movie patches are reconstructed using the player's own North American Sunshine disc image (GMSE01); Python is needed for installation, but FFmpeg and an AI runtime are not needed to install or play them. The catalog pins every original movie, downloaded patch and reconstructed movie by SHA-256. The installed pack carries over across game updates. See the port's HD cutscene guide for manual and offline installation.