XenogearsRecomp
Xenogears
OriginPlayStation
TechnologyStatic recompilation (native C/C++)
Available forWindows, Linux, macOS
View official projectAbout the project
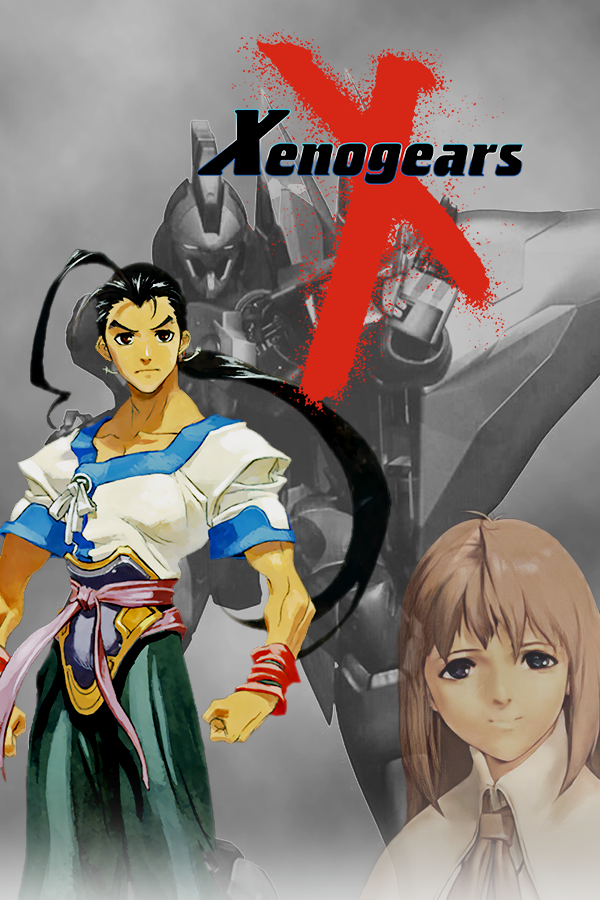
Xenogears es un videojuego de ciencia ficción de rol desarrollado y publicado por Square para la PlayStation de Sony. Fue lanzado el 11 de febrero de 1998 en Japón y el 20 de octubre de 1998 en EE. UU. El juego nunca fue lanzado en territorios PAL. Fue reeditado por SQUARE ENIX como un título Greatest Hits en 2003, y en la PlayStation Network el 25 de junio de 2008 en Japón y el 22 de febrero de 2011 en EE. UU.
4 versions of Xenogears
You're viewing: XenogearsRecomp
Official project information
XenogearsRecomp
Static recompilation of Xenogears (USA) for the PlayStation 1.
Built on PSXRecomp — a MIPS R3000A → C → native x64 static recompilation framework. Both the OpenBIOS and retail SCPH1001.BIN BIOS backends are recompiled alongside the game executable, producing a single binary that runs without an emulator.
⚠️ Alpha status. The game boots, reaches the title screen and intro FMV, and is playable — but not fully validated end to end. See Status.
Requirements
To run a release of XenogearsRecomp, you need your own legally obtained copy of:
- Xenogears (USA) — Disc 1 and Disc 2 disc images (
.cue+.binpreferred)
The separate game EXE (SLUS-006.64) is required only for source generation; it is not needed to run a release.
Release packages include the redistributable OpenBIOS image and its MIT notice. At runtime, a legally obtained matching SCPH1001.BIN is optional because OpenBIOS runs by default. From-source dual-backend generation currently requires a local, legally obtained SCPH1001.BIN matching the compiled retail backend.
No retail BIOS image, game disc image, or game assets are included in or distributed by this repository or its releases.
Build dependencies
| Dependency | Linux | macOS | Windows |
|---|---|---|---|
| C/C++ compiler | GCC or Clang | Apple Clang (Xcode) | clang-cl (recommended), MSVC, or MinGW |
| CMake ≥ 3.20 | system package | Homebrew / MacPorts | cmake.org |
| Ninja (recommended) | apt install ninja-build | brew install ninja | winget install Ninja-build.Ninja |
| pkg-config | apt install pkg-config | brew install pkg-config | (not needed) |
| Python ≥ 3.11 | system package | Homebrew / python.org | python.org / Windows Store |
| SDL3 ≥ 3.4 | system package or automatic source fetch | Homebrew / automatic source fetch | vcpkg, manual, or automatic source fetch |
SDL3 is the default backend; SDL2 remains an explicit compatibility fallback. If CMake cannot find a compatible SDL3 system package, the build downloads the integrity-pinned SDL3 release and links it into the runtime.
Status
Alpha. What works today, and what doesn't:
- ✅ Boots and plays — BIOS boot → game handoff, title screen, intro FMV, and the opening gameplay all run with rendering, audio, input, and memory-card saves
- ✅ Faster memory-card access: the card check, load and save now take about 1.6, 1.1 and 1.4 seconds instead of 5.3, 2.1 and 3.5, with the same card data. The BIOS gave a transfer only every other frame, the menu re-checked the cards twice, and its load and save loops waited a full frame per chunk. Set
XG_FAST_CARD_SERVICE=0andXG_FAST_CARD_FLOW=0to restore stock timing - ✅ AOT overlay pipeline — supported disc overlays are authenticated and compiled into the executable during the build
- ⚠️ Not validated end-to-end — no complete playthrough has been done; treat every area past the opening as unverified
- 🐛 Known issues:
- Most of the enhancements are untested or not yet fully polished, so expect some bugs if you use them.
Setup
1. Download a Release (recommended)
Grab the x86-64 archive for your platform from Releases, extract it, and run the executable. A launcher window opens.
- Set the game discs — on first launch, locate your legally obtained Xenogears (USA) disc images. Choose Disc 1 in Disc Selection and browse for its
.cuefile, then do the same for Disc 2. Each image is recognized by its own serial, so it always lands on the right disc, and both locations are remembered. The launcher verifies the ISO9660 header, region, and serial. - Optional: select a retail BIOS — OpenBIOS runs by default. To use the retail backend, select your legally obtained matching
SCPH1001.BIN(a 512 KB file dumped from your own console) via Settings → System → Browse. - Optionally adjust renderer, internal resolution, screen look, widescreen, and controller settings, then press Launch. Your choices are remembered.
Accepted disc formats: .cue + .bin and .chd. If the header or game ID
does not match a Xenogears (USA) disc, the launcher warns and tries to run the
image anyway.
Changing discs: Play boots whichever disc is selected in Disc Selection. When the game asks for Disc 2, save, quit, select Disc 2 in the launcher and continue from your save. Savestates are kept per disc.
Official Linux and Windows releases are 64-bit x86-64 builds with SDL3 linked
statically; no separate SDL installation is required.
Vulkan is the default and recommended renderer; OpenGL remains selectable.
Vulkan shaders are embedded in the executable. Playing requires a working GPU
driver, but no Vulkan SDK installation.
Selected paths persist next to the executable (settings.toml). Delete it to pick different files or reset settings.
2. Build from Source
2.1 Clone with submodules
git clone --recurse-submodules https://github.com/OpokXeno/xenogears-recomp.git
cd xenogears-recomp
If you already cloned without --recurse-submodules:
git submodule update --init --recursive
2.2 Place your game files
XenogearsRecomp/
├── game/
│   ├── slus_006.64              # Xenogears (Disc 1) main EXE — your rip
│   ├── Xenogears Disc 1.cue     # Disc index file (name depends on your rip)
│   ├── Xenogears Disc 1.bin     # Track 1 (data)
└── psxrecomp/
    └── bios/
        └── SCPH1001.BIN          # Retail BIOS — your local dump, required to build
Only Disc 1 is needed to build: both discs boot the same program, so one build
plays Disc 1 and Disc 2. Keep the .cue and its referenced .bin tracks together. The build also accepts
game/disc1.bin directly. For a different image location, use
XG_DISC=/path/to/disc.cue ./build.sh or the PowerShell -DiscImage option.
The disc and BIOS paths used to play are configured through the launcher GUI.
The
discandbios_pathfields ingame.tomlcan be set as a fallback, but are optional. The launcher prompts for the disc on first run and uses OpenBIOS unless you select the matching retail BIOS in Settings.
2.3 Build
Install Vulkan headers and the glslc shader compiler before building. On
Windows, install the Vulkan SDK and reopen
your terminal so VULKAN_SDK is available. Linux can use its Vulkan development
packages and glslc, or the SDK. For the same pinned tools as CI:
bash ci/provision-vulkan-tools.sh "$HOME/.local/xgr-vulkan"
export VULKAN_SDK="$HOME/.local/xgr-vulkan"
Normal builds require Vulkan (PSX_REQUIRE_VULKAN=ON): missing headers or a
shader compiler stop configuration rather than silently omitting the backend.
Linux / macOS:
./build.sh
Windows (PowerShell):
.\build.ps1
build.ps1 works from a regular PowerShell session. It uses Ninja when a
compiler is already configured; otherwise it selects Visual Studio 2022. When
Ninja is explicitly requested without an initialized compiler environment, the
script locates Visual Studio with vswhere, imports the x64 developer
environment, and verifies that cl.exe is available. To force the Visual Studio
generator:
.\build.ps1 -Generator "Visual Studio 17 2022"
This will:
- Build the recompiler (
psxrecomp-game) - Generate both BIOS backends: OpenBIOS from the tracked redistributable image and retail SCPH1001 from your local
psxrecomp/bios/SCPH1001.BIN - Recompile the game EXE to C
- Extract and authenticate the supported overlays from Disc 1, then compile their AOT code
- Link the game, BIOS backends, and AOT overlays into the runtime →
build/XenogearsRecompwith Ninja/single-config generators, orbuild/<BuildType>/XenogearsRecomp.exewith Visual Studio
The source build needs the local retail BIOS to generate the compiled SCPH1001 backend, even though runtime use of that backend is optional. The build stages only the redistributable OpenBIOS image and OpenBIOS.LICENSE; it does not package SCPH1001.BIN.
Note:
build.shuses Ninja. SetCMAKE_GENERATORto override it (for example,CMAKE_GENERATOR="Unix Makefiles"). Ninja and other single-config generators write directly underbuild/; Visual Studio writes underbuild/<BuildType>/. Use a fresh build directory when changing generators.
2.3.1 Debug builds
A Debug build turns on the developer tooling that Release strips out: the
TCP debug server (PSX_DEBUG_TOOLS) and the in-game debug menu overlay
(PSX_DEBUG_OVERLAY — a Dear ImGui panel toggled with Ctrl+F3 while the
game is running). See debug_overlay/README.md for
the full overlay reference (sections, data tables, TCP commands).
Both flags default ON for any non-Release build type (Debug,
RelWithDebInfo) when the recomp-ui launcher submodule is present, so a debug
binary is produced simply by choosing a debug CMAKE_BUILD_TYPE:
# Linux / macOS — debug build in ./build-dbg
./build.sh build-dbg Debug
# or, for optimized-with-debug-info:
./build.sh build-dbg RelWithDebInfo

# Windows (PowerShell)
.\build.ps1 -BuildDir build-dbg -BuildType Debug
Native renderer record hashing is an opt-in diagnostic:
PSX_NATIVE_RECORD_AUDIT=1 enables the bytewise record audit, and
PSX_NATIVE_RECIPE_AUDIT=1 also enables it alongside recipe verification.
Normal play still uses source/resource identities and rendered-image digests.
Native timing and phase-selection buffers retain their latest 8192 records so
profiling a long-running scene includes its current queue and presentation delays.
The Native compiler can prepare up to two queued transactions while OpenGL
finishes the current one. Preparation remains private until FIFO promotion;
native_pipeline_diag reports prefetch_prepared, prefetch_used,
prefetch_discarded, and prefetch_cpu_ns under gpu.
Prepared journals also include vertex and attribute/depth data for the GL owner.
The raw-word texture keeps its storage across transactions, and phase resets
restore only the word blocks changed since the shared baseline.
2.3.2 Windows: building with clang-cl (recommended)
clang-cl is the Clang compiler that ships with Visual Studio. It builds this project without any source changes, and it is the toolchain we recommend on Windows.
Install Visual Studio 2022 (or the Build Tools) with the Desktop development with C++ workload and the C++ Clang Compiler for Windows component. Then, from a regular PowerShell session:
$env:CC = "clang-cl"; $env:CXX = "clang-cl"
.\build.ps1
When CC or CXX names clang-cl, build.ps1 imports the Visual Studio
developer environment and uses Ninja, so no special prompt is needed. Debug
builds work the same way (-BuildType Debug). Ninja and CMake come with Visual
Studio, so nothing else needs installing.
A few things to watch for:
- Keep MSYS2 out of
PATH. IfC:\msys64\mingw64\bin(or similar) is onPATH, CMake's zlib lookup finds MSYS2's MinGW headers, and clang-cl cannot compile against them. Remove it fromPATHfor the session, or build from a shell that does not have it. - Switching compilers. The recompiler build directory
(
psxrecomp/recompiler/build) remembers the generator it was first configured with. If you built with another toolchain before, pointPSX_RECOMPILER_BUILDat a new directory, or delete the old one.
2.4 Run
# Ninja/single-config
./build/XenogearsRecomp

# Visual Studio multi-config (replace Release as needed)
.\build\Release\XenogearsRecomp.exe
First launch — the integrated launcher GUI will open. Locate both disc images (.cue) from the main screen: choose each disc in Disc Selection and browse for it, then press Launch. OpenBIOS runs by default. To use the retail backend, select your matching SCPH1001.BIN in the Settings → System panel (Browse button). Choices are saved to settings.toml next to the executable.
Subsequent launches — settings are loaded from settings.toml. Skip the launcher GUI with --no-launcher or PSX_NO_LAUNCHER=1.
If you prefer to set paths statically, configure them in
game.tomland the launcher will pick them up as defaults.
2.5 Manual recompilation
If you only need to regenerate the game C source (after changing game config or seeds):
# Linux / macOS
./psxrecomp/recompiler/build/psxrecomp-game --config game.toml --source-observation-plan native_renderer/xg_render_resident_plan.txt

# Windows with Ninja/single-config
.\psxrecomp\recompiler\build\psxrecomp-game.exe --config game.toml --source-observation-plan native_renderer/xg_render_resident_plan.txt

# Windows with Visual Studio multi-config (replace Release as needed)
.\psxrecomp\recompiler\build\Release\psxrecomp-game.exe --config game.toml --source-observation-plan native_renderer/xg_render_resident_plan.txt
Or use the regen script:
# Linux / macOS (from the project root, requires recompiler built)
psxrecomp/recompiler/build/psxrecomp-game --config game.toml --source-observation-plan native_renderer/xg_render_resident_plan.txt

# Windows
.\regen.ps1
3. Configure mods
Open Mods in the launcher to enable included enhancements or install a
local .psxmod package. Packages are validated and applied over your stock disc
without modifying it. See MODS.md for the included catalog,
installation steps, package authoring, compatibility, and safety details.
Separately compiled C/C++ function hooks are supported; see MOD_NATIVE_HOOKS.md for the
versioned API and independent example.
Controls
| Action | Keyboard | Controller (Xbox) |
|---|---|---|
| D-Pad / Move | Arrow keys | Left stick / D-pad |
| Cross / Confirm | X | A |
| Circle / Cancel | S | B |
| Square / Menu | Z | X |
| Triangle | A | Y |
| Start | Enter | Start |
| Select | Right Shift | Back |
| L1 / L2 | Q / E | LB / LT |
| R1 / R2 | W / R | RB / RT |
| Fullscreen toggle | F11 | — |
| Show/hide menu bar | F10 | — |
| Debug menu overlay | Ctrl+F3 | — |
Full rebinding is available through in-app settings.
The Debug menu overlay (Ctrl+F3) only exists in Debug / DebugTools builds — Release carries zero code for it. See
debug_overlay/README.mdfor what each section does and how to drive the same actions over TCP.
Project structure
XenogearsRecomp/
├── build.sh / build.ps1      # Build scripts (root, tracked) — accept a build dir
│                             #   + build type: ./build.sh build-dbg Debug
├── regen.ps1                 # Windows recompilation script
├── CMakeLists.txt            # Game runtime CMake build
├── game.toml                 # Game configuration (patches, widescreen, runtime)
├── MODS.md                   # Player-facing mod guide
├── MOD_AUTHORING.md          # Detailed .psxmod authoring guide
├── MOD_NATIVE_HOOKS.md       # External C/C++ hooks, API and trust model
├── game/                     # YOUR game EXE / disc image (not tracked)
├── generated/                # Recompiled C source from game EXE (not tracked)
├── overlays/                 # Captured overlay binaries (not tracked)
├── native_renderer/          # Authenticated Xenogears-native 3D renderer
│   ├── include/              #   public render/authentication contracts
│   ├── src/                  #   field, world, model and sprite native paths
│   ├── tests/                #   renderer, capture and parity tests
│   ├── xg_render_manifest.toml          # resident producer identity
│   ├── xg_render_runtime_variants.toml  # authenticated runtime variants
│   ├── xg_render_overlay_ranges.toml    # overlay cutovers/source ranges
│   ├── xg_render_resident_plan.txt      # recompiler observation plan
│   └── xg_3d_certification.toml         # native 3D certification record
├── seeds/                    # Recompiler seed addresses (tracked)
│   ├── slus_00664_seeds.txt
│   └── slus_00664_bios_thunks.txt
├── annotations/              # Function annotation CSV for recompiler (tracked)
├── debug_overlay/            # In-game developer debug overlay (Debug builds only)
│   ├── README.md             #   overlay reference — sections, TCP commands
│   └── data/                 #   XML data tables (fields, chars, events, addrs…)
├── docs/                     # Project docs (recompile, manual test guides, etc.)
└── psxrecomp/                # PSXRecomp framework submodule
    ├── bios/
    │   └── SCPH1001.BIN     # YOUR local retail BIOS, required for source builds
    ├── generated/            # Recompiled BIOS C sources (not tracked)
    ├── runtime/              #   PS1 hw simulation + GL/VK/SW renderers
    │   ├── src/              #     main.cpp, gpu_*, spu.c, debug_overlay.cpp, …
    │   └── tests/            #     host-side hygiene/data tests
    ├── recompiler/           #   MIPS→C static recompiler (builds psxrecomp-game)
    └── lib/recomp-ui         #   Launcher UI (nested submodule, pinned upstream)
How it works
- Recompilation:
psxrecomp-gamereads the game EXE (slus_006.64) and translates MIPS R3000A instructions into C code, guided by seed addresses and annotations. - Runtime build: The generated C is compiled with a PS1 hardware simulation runtime (GPU, SPU, CD-ROM, DMA, timers, interrupt controller, GTE, SIO, memory cards) and linked into a native executable.
- Native rendering: Authenticated game render producers feed the game-specific renderer for field, world, model, sprite, effects, water and shadow paths. Identity-bound manifests and source observations gate every cutover; unsupported work stays on the original PS1 GPU path.
- Execution: Both BIOS backends compile into the executable. OpenBIOS is the default; a selected matching retail
SCPH1001.BINbackend can be used instead. Game code and supported overlays execute as statically compiled native functions. When the game loads an overlay from disc, its identity selects the corresponding linked AOT code.
AOT overlay compilation
Overlays are chunks of code the game streams off the disc at runtime. Xenogears is heavily overlay-driven (field, battle, worldmap are all separate overlay modules).
- Build time: The recompiler and host C/C++ compiler generate and link the supported overlay identities from the local Disc 1 image. Disc 2 carries the same overlay images, so the same code serves both discs.
- Play time: The executable already contains that code, including on the first launch. No background compilation or cache warm-up is needed.
- Coverage:
overlay_cache = falsedisables the dynamic overlay path. An AOT coverage miss is an error to report, not a request to install a compiler.
Contributing
Contributions are welcome. The highest-value ones:
- Reverse-engineering notes — function names, behaviors, and struct layouts in
annotations/, and entry-point seeds inseeds/. This is what makes the recompilation better over time. - Bug reports — open an issue with repro steps, your platform, and the scene/frame where it happens. A description plus
psx_last_run_report.jsonis enough. - Code — runtime, overlay pipeline, renderer, and launcher fixes. Keep PRs focused and describe what you tested.
Ground rules:
- Never commit game-derived data.
- You need your own legally obtained game EXE and disc image, plus a local legally obtained
SCPH1001.BINto generate the retail backend from source (see Requirements). - AI-assisted contributions are fine (see below) — you're responsible for what you submit regardless of how it was produced.
AI-Assisted Development
This project is developed with AI assistance: coding agents take part in reverse engineering, code generation, debugging, and documentation. Expect the occasional rough edge typical of AI-assisted code — reports and cleanups are welcome.
AI output is held to the same bar as human work: it must build, boot, and match reference behavior (DuckStation oracle, interpreter failover) where applicable. If you use AI tools in a contribution, please disclose it; the legal and quality requirements are identical either way.
Legal
XenogearsRecomp is licensed under PolyForm Noncommercial 1.0.0. See LICENSE.
No retail PS1 BIOS image, including SCPH1001.BIN, is included in or distributed by this project.
Release packages include the redistributable OpenBIOS image at bios/openbios.bin and its MIT notice at bios/OpenBIOS.LICENSE.
This project does not include or distribute:
- Any game disc image or EXE
- Any game assets (textures, audio, models, scripts)
- Any copyrighted game code as source
The overlay capture store (overlay_captures.json, overlays/) contains verbatim game code snapshots and is not redistributable.
Only the following are tracked in this repository:
- Build configuration and scripts
- Recompiler seed data (function entry addresses — metadata, not code)
- Function annotations (reverse-engineering notes)
- Game-specific settings in
game.toml
Acknowledgments
- Matthew Stan — creator of PSXRecomp, the framework this project is built on
- PS1 Recompilation community